Stap 8: Arduino & Motor installatie van de PCB


Foto 1 Toont Motor Controller Breakout Board met DRV8833 IC en 5V regulator voor 9g servo.
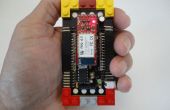
Foto 2, 3, 4 DIY Arduino en motorcontroller PCB, XBee module en XBee Breakout board (Jameco onderdeel nr. 2163680)
Foto 5, 6 installatie van 3.7V LiPo oplaadbare batterij als de stroomvoorziening voor de Arduino en Xbee Module.
Foto 7, 8, 9 Installatie van Arduino en motorcontroller PCB.
Zie instructies voor montage van de PCB met LEGO onderdelen in stap 10 van R/C LEGO auto Redux moet worden gebruikt.
Foto 10, 11 De installatie van de 7.5V toont LiPo batterij.
Foto 12, 13 Toont een alternatieve installatie van 9V batterij.
