Stap 4: Server


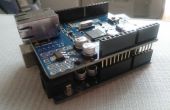
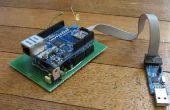
Een belangrijk ding in gedachten te houden is dat zul je je Arduino van IP-adres invoeren in beide voorbeelden hieronder in om voor hen te werken.
De volgende wijzigingen in de code de webpagina's geserveerd op basis van een druk op de knop:
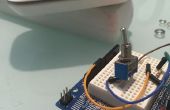
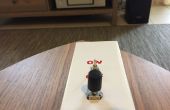
/* Web Server Demo thrown together by Randy Sarafan A simple web server that changes the page that is served, triggered by a button press. Circuit: * Ethernet shield attached to pins 10, 11, 12, 13 * Connect a button between Pin D2 and 5V * Connect a 10K resistor between Pin D2 and ground Based almost entirely upon Web Server by Tom Igoe and David Mellis Edit history: created 18 Dec 2009 by David A. Mellis modified 4 Sep 2010 by Tom Igoe */ #include <SPI.h> #include <Ethernet.h> // Enter a MAC address and IP address for your controller below. // The IP address will be dependent on your local network: byte mac[] = { 0x00, 0xAA, 0xBB, 0xCC, 0xDA, 0x02 }; IPAddress ip(191,11,1,1); //<<< ENTER YOUR IP ADDRESS HERE!!! // Initialize the Ethernet server library // with the IP address and port you want to use // (port 80 is default for HTTP): EthernetServer server(80); int buttonPress = 1; void setup() { pinMode(2, INPUT); // start the Ethernet connection and the server: Ethernet.begin(mac, ip); server.begin(); } void loop() { buttonPress = digitalRead(2); // listen for incoming clients EthernetClient client = server.available(); if (client) { // an http request ends with a blank line boolean currentLineIsBlank = true; while (client.connected()) { if (client.available()) { char c = client.read(); // if you've gotten to the end of the line (received a newline // character) and the line is blank, the http request has ended, // so you can send a reply if (c == '\n' && currentLineIsBlank) { // send a standard http response header client.println("HTTP/1.1 200 OK"); client.println("Content-Type: text/html"); client.println(); //serves a different version of a website depending on whether or not the button //connected to pin 2 is pressed. if (buttonPress == 1) { client.println("<cke:html><cke:body bgcolor=#FFFFFF>LIGHT!</cke:body></cke:html>"); } else if (buttonPress == 0){ client.println("<cke:html><cke:body bgcolor=#000000 text=#FFFFFF>DARK!</cke:body></cke:html>"); } break; } if (c == '\n') { // you're starting a new line currentLineIsBlank = true; } else if (c != '\r') { // you've gotten a character on the current line currentLineIsBlank = false; } } } // give the web browser time to receive the data delay(1); // close the connection: client.stop(); } } Om deze voorbeeldcode werken, gewoon het toevoegen van een knop tussen pin D2 en 5V, een 10K Ohm weerstand tussen pin D2 en grond en laadt vervolgens het IP-adres van uw Arduino in uw webbrowser. De pagina moet laden met een zwarte achtergrond. Houd de knop ingedrukt houden, en vernieuw dan de browserpagina. De site moet nu laden met een witte achtergrond.
De volgende code brandt een LED afhankelijk van de URL die is verzonden naar de Arduino:
/* Web Server Demo thrown together by Randy Sarafan Allows you to turn on and off an LED by entering different urls. To turn it on: http://your-IP-address/$1 To turn it off: http://your-IP-address/$2 Circuit: * Ethernet shield attached to pins 10, 11, 12, 13 * Connect an LED to pin D2 and put it in series with a 220 ohm resistor to ground Based almost entirely upon Web Server by Tom Igoe and David Mellis Edit history: created 18 Dec 2009 by David A. Mellis modified 4 Sep 2010 by Tom Igoe */ #include <SPI.h> #include <Ethernet.h> boolean incoming = 0; // Enter a MAC address and IP address for your controller below. // The IP address will be dependent on your local network: byte mac[] = { 0x00, 0xAA, 0xBB, 0xCC, 0xDA, 0x02 }; IPAddress ip(191,11,1,1); //<<< ENTER YOUR IP ADDRESS HERE!!! // Initialize the Ethernet server library // with the IP address and port you want to use // (port 80 is default for HTTP): EthernetServer server(80); void setup() { pinMode(2, OUTPUT); // start the Ethernet connection and the server: Ethernet.begin(mac, ip); server.begin(); Serial.begin(9600); } void loop() { // listen for incoming clients EthernetClient client = server.available(); if (client) { // an http request ends with a blank line boolean currentLineIsBlank = true; while (client.connected()) { if (client.available()) { char c = client.read(); // if you've gotten to the end of the line (received a newline // character) and the line is blank, the http request has ended, // so you can send a reply //reads URL string from $ to first blank space if(incoming && c == ' '){ incoming = 0; } if(c == '$'){ incoming = 1; } //Checks for the URL string $1 or $2 if(incoming == 1){ Serial.println(c); if(c == '1'){ Serial.println("ON"); digitalWrite(2, HIGH); } if(c == '2'){ Serial.println("OFF"); digitalWrite(2, LOW); } } if (c == '\n') { // you're starting a new line currentLineIsBlank = true; } else if (c != '\r') { // you've gotten a character on the current line currentLineIsBlank = false; } } } // give the web browser time to receive the data delay(1); // close the connection: client.stop(); } } Om dit werk steek de positieve stekker een LED aan pin D2, en de negatieve lood in serie met een weerstand van 220 ohm op grond.
De LED Voer dit om in te schakelen in uw browser:
http://[Je IP-adres hier]$1
De LED Voer dit om uit te schakelen in uw browser:
http://[Je IP-adres hier]$2
Nota: U moet uiteraard Vervang [Uw IP-adres hier] met uw IP-adres.
