Stap 4: Op Mode en HC-05 reset.
In de meeste referenties, wordt u gevraagd handmatig verbreken/opnieuw verbinden de voeding naar de HC-05 om zet het in op modus (met pin.34 hoge gestoken) of terug in data-modus (met dezelfde pincode in lage staat). Dit is onzinnig als uw toepassing vereist over heen en weer in volgorde van/naar opdrachtmodus te schakelen.
De truc is om het toestaan van Arduino om te controleren de resetpin (pin no.11) die de module reset. Het proces is als volgt
Zet op commandomodus:
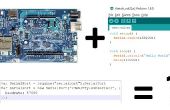
digitalWrite(pinEn,HIGH); // Set the Enable pin (no.34) to HIGH, and keep it during the AT command digitalWrite(pinRe,LOW); // Set the Reset pin (no.11) to LOW, this postpones the module in preparation to reset delay(100); // A short delay (should be more that 10 ms) to simulate a negative pulse on the reset pin digitalWrite(pinRe,HIGH); // Set the Reset pin back to HIGH, and with Enable pin set to HIGH, the module restarts in AT Command mode.
Om te zetten in wijze van de transmissie van de gegevens:
digitalWrite(pinEn,LOW); // Set the Enable pin (no.34) to LOW, and keep it during the data transmission modedigitalWrite(pinRe,LOW); // Set the Reset pin (no.11) to LOW, this postpones the module in preparation to reset delay(100); // A short delay (should be more that 10 ms) to simulate a negative pulse on the reset pin digitalWrite(pinRe,HIGH); // Set the Reset pin back to HIGH, and with Enable pin set to LOW, the module restarts in Data transmission mode.
