Stap 3: Bluetooth Test


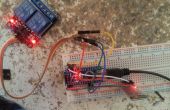
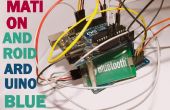
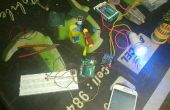
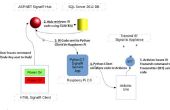
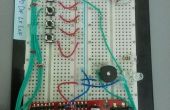
Eerst uit de draad van het circuit zoals hierboven. Ik heb gebruikt een breadboard en maakte één spoor positief en een negatief. Vervelend vond ik dat de TXD en RXD pinnen op de Bluetooth-module wanneer verbonden met de dezelfde PIN op de arduino zelf niet werken. De TXD pin op de Bluetooth-module ik heb aangesloten op de RXD pin op de arduino pin (0) en de RXD pin op de Bluetooth-module is aangesloten op de TXD pin op de arduino (pin 1). De Bluetooth-Module 3.3V zal weggelopen maar de estafette 5v moet werken, dus ik heb 5 volt op de arduino gebruikt.
Hier is de code die ik voor deze relay 2-switch geschreven heb. Als voorbeeld heb ik het besturen van een waterkoker en een lamp.
/* ------------------------------------------------------------------------ InfidelFish ------------------------------------------------------------------------ */ String voice; #define relay1 2 //Connect relay1 to pin 2 #define relay2 3 //Connect relay2 to pin 3 void setup() { Serial.begin(9600); //Set rate for communicating with phone pinMode(relay1, OUTPUT); //Set relay1 as an output pinMode(relay2, OUTPUT); //Set relay2 as an output digitalWrite(relay1, LOW); //Switch relay1 off digitalWrite(relay2, LOW); //Swtich relay2 off } void loop() { while(Serial.available()) //Check if there are available bytes to read { delay(10); //Delay to make it stable char c = Serial.read(); //Conduct a serial read if (c == '#'){ break; //Stop the loop once # is detected after a word } voice += c; //Means voice = voice + c } if (voice.length() >0) { Serial.println(voice); if(voice == "*switch on"){ switchon(); } //Initiate function switchon if voice is switch on else if(voice == "*switch off"){ switchoff(); } //Initiate function switchoff if voice is switch off else if(voice == "*lamp on"){ //You can replace 'lamp on' with anything you want...same applies to others digitalWrite(relay1, HIGH); } else if(voice == "*lamp off"){ digitalWrite(relay1, LOW); } else if(voice == "*kettle on"){ digitalWrite(relay2, HIGH); } else if(voice == "*kettle off"){ digitalWrite(relay2, LOW); } voice=""; } } void switchon() //Function for turning on relays { digitalWrite(relay1, HIGH); digitalWrite(relay2, HIGH); } void switchoff() //Function for turning on relays { digitalWrite(relay1, LOW); digitalWrite(relay2, LOW); } /* You can add any function you want depending on how many devices you have hooked up. For example you could have a function called 'cinema' which would dim the lights and turn the TV on. You can have as many as you have pins on your arduino. For my relay 'LOW' turns off and 'HIGH' turns on The outline to follow is this: void ......() { digitalWrite(...., LOW/HIGH); digitalWrite(...., LOW/HIGH); } */ Wanneer u de code naar je Arduino uploadt, zorg ervoor dat u loskoppelt pinnen 0 en 1 anders die je waarschijnlijk deze krijgen zul fout:
avrdude: stk500_getsync(): niet synchroon: resp = 0x00
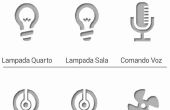
Nu op uw android phone download dit briljante app door SimpleLabs!
https://Play.Google.com/Store/apps/Details?id=robotspace.simplelabs.amr_voice&hl=en
Verbinden naar de Bluetooth module zal waarschijnlijk worden genoemd iets als 'HC-06'
De eerste keer op zal vragen u voor een wachtwoord dat meestal 1234 is.
Zodra u hebt aangesloten zeggen de opdrachten die u hebt gekozen in de code en hopelijk zal het Relais wissel voort en vandoor!
