Stap 3: Een LED aan en uit zetten en knipperen met knop en Code

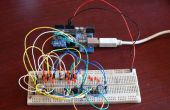
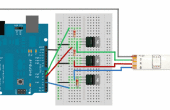
Nu, dit project kan lijken op het eerste, maar het is niet. In plaats van rechtstreeks verbinden met de knop de LED, gebruikt u code om te zetten in- en uitschakelen. Instellen van het circuit zoals en lees de opmerkingen in de code voor informatie over hoe het werkt.
const int buttonPin = 2; // Tell Arduino that button is pin 2const int ledPin = 8; // Tell Arduino that LED is pin 8int buttonState = 0; // Button variable(whether it is on or off)void setup() { pinMode(ledPin, OUTPUT); // Declare LED as output pinMode(buttonPin, INPUT); // Declare button as input }void loop(){ buttonState = digitalRead(buttonPin); // Tell arduino to read state of button if (buttonState == HIGH) { // If the button is on... digitalWrite(ledPin, HIGH); // Turn the LED on } else { // If it isn't... // turn LED off: digitalWrite(ledPin, LOW); // Turn it off } } Nu, laten we het LED knipperen in- en uitschakelen wanneer de knop wordt ingedrukt.
const int ledPin = 8; // Tell Arduino that button is pin 2 const int buttonPin = 2; // Tell Arduino that LED is pin 8// Initialize button, LEDs, timer, etc...int ledState = LOW; int buttonState = 0; long previousMillis = 0; long interval = 1000; void setup() { pinMode(ledPin, OUTPUT); // Declare LED an output pinMode(buttonPin, INPUT); //Decalare button an input }void loop() { buttonState = digitalRead(buttonPin); // Read if button is on or off if(buttonState == HIGH) { // If button is on...// Timer: unsigned long currentMillis = millis(); if(currentMillis - previousMillis > interval) { previousMillis = currentMillis; // Decide whether LED should be on or off if (ledState == LOW) ledState = HIGH; else ledState = LOW; digitalWrite(ledPin, ledState); // Turn LED on or off } } else { // If button isn't on... digitalWrite(ledPin, LOW); // Turn LED off }}
