Stap 3: Circuit


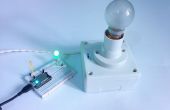
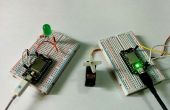
Het circuit voor dit is werkelijk eenvoudig, alle onderdelen die deel uitmaken van het circuit is een vonk kern en een 3V Relay. Het circuit diagram vindt u hierboven, ik had een PCB geëtst en de etchable PDF-bestand kan worden gevonden in de bijlagen.
Soldeer van alle onderdelen en probeer het knipperen voorbeeld zoals hieronder u hoort het geluid van de relais een klik elke 5 seconden, als je hoort het geluid dat alles goed is gegaan en u doorgaan met met de volgende stap installeren kunt.
<p>int led1 = D0; // Instead of writing D0 over and over again, we'll write led1<br>// You'll need to wire an LED to this one to see it blink.<br>int led2 = D7; // Instead of writing D7 over and over again, we'll write led2<br>// This one is the little blue LED on your board. On the Photon it is next to D7, and on the Core it is next to the USB jack. // Having declared these variables, let's move on to the setup function. // The setup function is a standard part of any microcontroller program. // It runs only once when the device boots up or is reset. void setup() { // We are going to tell our device that D0 and D7 (which we named led1 and led2 respectively) are going to be output // (That means that we will be sending voltage to them, rather than monitoring voltage that comes from them) // It's important you do this here, inside the setup() function rather than outside it or in the loop function. pinMode(led1, OUTPUT); pinMode(led2, OUTPUT); } // Next we have the loop function, the other essential part of a microcontroller program. // This routine gets repeated over and over, as quickly as possible and as many times as possible, after the setup function is called. // Note: Code that blocks for too long (like more than 5 seconds), can make weird things happen (like dropping the network connection). The built-in delay function shown below safely interleaves required background activity, so arbitrarily long delays can safely be done if you need them. void loop() { // To blink the LED, first we'll turn it on... digitalWrite(led1, HIGH); digitalWrite(led2, HIGH); // We'll leave it on for 1 second... delay(1000); // Then we'll turn it off... digitalWrite(led1, LOW); digitalWrite(led2, LOW); // Wait 5 second... delay(5000); // And repeat! }</p>
