Stap 3: knipperen


Zodra je de core setup, is het tijd om het eerste programma uploaden naar het standaardprogramma is tinker en het luistert naar opdrachten van uw android telefoon. Het uploadproces is draadloos, gaan de Deeltjes bouwen IDE en neem een kijkje op de interface die dit is waar we typen en uploaden van de programma's tot de kern.
Maak een nieuwe app en dit programma te plakken in de editor
int led1 = D0; // Instead of writing D0 over and over again, we'll write led1// You'll need to wire an LED to this one to see it blink.int led2 = D7; // Instead of writing D7 over and over again, we'll write led2 // This one is the little blue LED on your board. On the Photon it is next to D7, and on the Core it is next to the USB jack.// Having declared these variables, let's move on to the setup function. // The setup function is a standard part of any microcontroller program. // It runs only once when the device boots up or is reset.void setup() { // We are going to tell our device that D0 and D7 (which we named led1 and led2 respectively) are going to be output // (That means that we will be sending voltage to them, rather than monitoring voltage that comes from them) // It's important you do this here, inside the setup() function rather than outside it or in the loop function. pinMode(led1, OUTPUT); pinMode(led2, OUTPUT);}// Next we have the loop function, the other essential part of a microcontroller program. // This routine gets repeated over and over, as quickly as possible and as many times as possible, after the setup function is called. // Note: Code that blocks for too long (like more than 5 seconds), can make weird things happen (like dropping the network connection). The built-in delay function shown below safely interleaves required background activity, so arbitrarily long delays can safely be done if you need them.void loop() { // To blink the LED, first we'll turn it on... digitalWrite(led1, HIGH); digitalWrite(led2, HIGH); // We'll leave it on for 1 second... delay(1000); // Then we'll turn it off... digitalWrite(led1, LOW); digitalWrite(led2, LOW); // Wait 1 second... delay(1000); // And repeat! } Dan upload het programma door te klikken op de flash knop aan de bovenkant van het scherm verlaten.
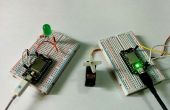
De kern zal knipperen magenta en vervolgens draai cyaan die aangeeft van een succesvolle flitser. Nu moet u de LED op de digitale pin 7 knipperen.
